How to Smoke a Brisket in a Masterbuilt Smoker
Originally posted on https://www.pioneersmokehouses.com/how-to-smoke-a-brisket-in-a-masterbuilt-smoker/
Fall is upon us! That means it’s almost the season for cooler nights and tailgating under the stars.
When you want to please and feed a crowd, nothing impresses like a juicy, flavorful beef brisket. However, while it’s one of the most delicious meals around, it can quickly turn dry and tough if you handle it the wrong way.
Enter, the Masterbuilt smoker.
This line of professional-grade smokehouse gear delivers a decadent cut of meat every time. Did you decide to snag one for your backyard? If so, read on.
Today, we’re sharing how to smoke a brisket in your Masterbuilt masterpiece. Be sure to pick up plenty of beef at the store, because you’re bound to attract the neighbors.
Ready to learn more? Let’s get started!
Choosing the Perfect Smoker
The first step to creating the perfect brisket is to find the perfect smoker.
Within the Masterbuilt collection, you’ll have a few different options. For simplicity’s sake, we’re using a recipe that relies on a digital electric smoker. The models available through Masterbuilt include the:
- Masterbuilt MES 430|S: Bluetooth Digital Electric Smoker
- Masterbuilt MES 440|S: Bluetooth Digital Electric Smoker
- Masterbuilt MES 340|G: Bluetooth Digital Electric Smoker
- Sportsman Elite 30-inch Bluetooth Smart Digital Electric Smoker
Innovative and future-focused, all of these smokers utilize Bluetooth technology. This allows you to monitor and control the cooking experience from your smart device or digital control panel.
The various models differ on the following attributes:
- The number of available smoke settings
- The number of smoking racks
- The wattage of the cooking element and smoke element
For those who are new to the art of smoking meat, the Masterbuilt MES 340|G is the perfect size to learn on. Once you add your meat, you can deliver incredible flavor via the unique wood chip loading system on the side.
Once you’ve determined the Masterbuilt model that will meet your needs, it’s time to get the recipe going! Let’s take a look at the steps to take.
Smoke a Brisket in Five Easy Steps
Sometimes, the best recipes are those that are unfussy and uncomplicated. This straightforward approach tends to create some of the richest and most potent flavors.
We also happen to believe that simple and slow is the best way to smoke a brisket. Here are the steps to follow.
1. Prepare the Brisket
First, you’ll need to choose the brisket you plan to use.
If you’re planning to feed a good-sized crowd, aim for one that weighs at least 10 pounds. For reference, this recipe uses a 13-pound cut of meat, which yields around six pounds of smoked brisket.
While your brisket might be bigger or smaller than this, keep in mind that the steps should yield a similar result as long as you’re within a pound or two.
When you visit the butcher, you’ll find that you can choose between different types of brisket, including:
- Flat brisket
- Whole or “packer” brisket
A flat brisket is the meaty portion only, while the whole brisket also includes the fat cap. We advise choosing a whole brisket, as it’s that valuable fat cap that keeps the meat moist!
To begin, wash your brisket thoroughly.
While the thermal process of smoking the brisket will help eliminate harmful bacteria, it only takes a few seconds to run it under the water, so don’t skip this step!
Next, you’ll need to determine the amount of fat you plan to leave on the brisket. For an ideal balance, aim to trim the meat down so only one-quarter of it is fat. You can also trim the fat between the flat and the deckle of the brisket, creating a small separation between these two parts.
Of course, if you equate fat to flavor and want to leave more intact, you can trim less at this step! Make sure to leave at least a little on, as it helps with the basting process.
At this point, if you plan to separate your brisket into separate pieces to fit inside of your Masterbuilt smoker, you can go ahead and do that now.
2. Apply Your Rub
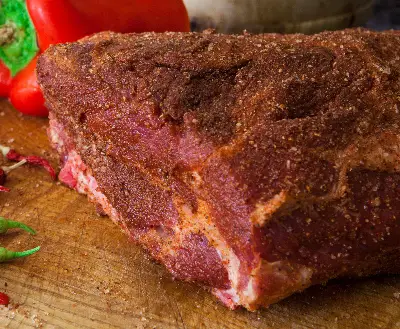
When your meat is cut and separated as you like it, it’s time to give it a little rub!
A quick Google search will yield plenty of dry rubs that promise robust flavor, so feel free to get creative here! Some of the most common spices include:
 dry rubbed roast
- Tarragon
- Chili powder
- Paprika
- Pepper
- Oregano
- Thyme
- Coriander
- Garlic powder
- Onion powder
Need a little inspiration? Check out this list of DIY spice rubs you can create in minutes and keep on hand for an impromptu cookout!
Mix up your rub to taste and coat the brisket with it. Resist the urge to throw the meat directly in the smoker. Instead, let it sit at room temperature to absorb the flavors of the rub first.
3. Cook Your Brisket
Now, it’s time for the fun part!
Preheat your Masterbuilt smoker to 250 degrees Fahrenheit. Once it’s hot enough, it’s time to add in your wood chips.
While some people are hickory enthusiasts only, we encourage you to try a blend of both hickory and applewood chips! This combination is a palate pleaser and is great when you’re feeding a crowd with diverse preferences. The apple gives a slight sweetness to the hickory flavor, which can be overpowering in some applications.
When the smoker is ready, insert a meat thermometer into the thickest part of your brisket, making sure to hit the meat portion rather than the fat. Then place the meat inside of the smoker.
Allow around six hours for the meat to reach the desired temperature of 165 degrees Fahrenheit. Keep in mind that the temperature reading will always trump the time. If it’s been six hours and you still haven’t reached 165 degrees, keep the brisket in the smoker.
Rather than setting your timer for six hours and walking away until then, check the thermometer regularly. Around the three-hour mark, check the meat and add more wood chips, if needed. This is important, as your meat will reach its maximum smoke intake at this point.
4. Create Your Sauce
Once your meat is ready, you can remove the meat from the smoker and start preparing your sauce! A juicy brisket relies on sauce to keep it full of flavor.
One of our go-to recipes includes only three ingredients. Go ahead and pick up these supplies and keep them on hand to make a quick sauce any time you need it:
- Four tablespoons of butter
- 1/2 cup of honey
- 1/2 cup of brown sugar
Take out your meat and rub the sauce all over it. Then, cover the brisket up with aluminum foil.
5. The Final Cooking Stage
At this point, you might feel tempted to tear into the foil and taste the meat, already! Yet, patience is a virtue, especially in this case.
Place your wrapped meat back in the Masterbuilt smoker.
Then, cook it again until it reaches an internal temperature of 200 degrees Fahrenheit. In most cases, this will take an additional 2.5 hours or so, though remember that time isn’t the metric to use.
Once you’ve hit that mark, take the brisket out of the smoker. Allow it to rest at room temperature for about two hours to absorb all of the flavors from the rub and the sauce.
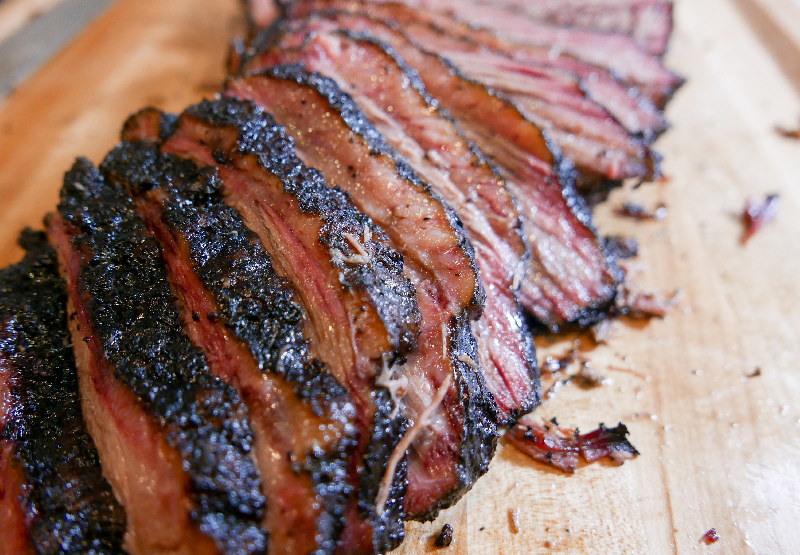
Although these steps can take all day, the result is more than worth it. When you’re finally ready to unwrap the foil and share a meal with your guests, the tenderness and aroma will knock your socks off.
Smoke Your Best Brisket Today
There’s nothing like the smell of a delicious brisket wafting through the cool autumn air. Whether you’re cooking for the whole block or just your family on a Monday night, you can’t go wrong with this meal.
Yet, as with most recipes, the gear you cook with matters. That’s why it’s smart to choose one of the best electric smokers on the market, such as a Masterbuilt model. Built to last and proven to deliver high-quality results, these tools are well worth the investment.
Using this easy recipe, head to the supermarket and gather the ingredients you need. Then, invite your loved ones over and smoke a brisket they’ll never forget.
Looking for advice on which smoker to buy or how to perfect your smoking techniques? We’re experts in this space, and we’ve got you covered.
Check out our other smokehouse tips and advice, such as this article on how to smoke a turkey, just in time for Thanksgiving!
